Some dogs go wild for chicken. Others lose their minds for cheese. But peanut butter? That’s the universal tail-wagger. Add creamy, gut-friendly yogurt into the mix and you’ve got a frozen treat so good, your dog might actually sit before you say the word.
These 3 easy peanut butter and yogurt frozen dog treat recipes are everything you need this season. They’re fast to make, packed with protein and probiotics, and perfect for spoiling your pup without heating up the kitchen.
Ready to make your freezer the happiest place in your house? Let’s go.
Peanut Butter Yogurt Cubes
Ingredients
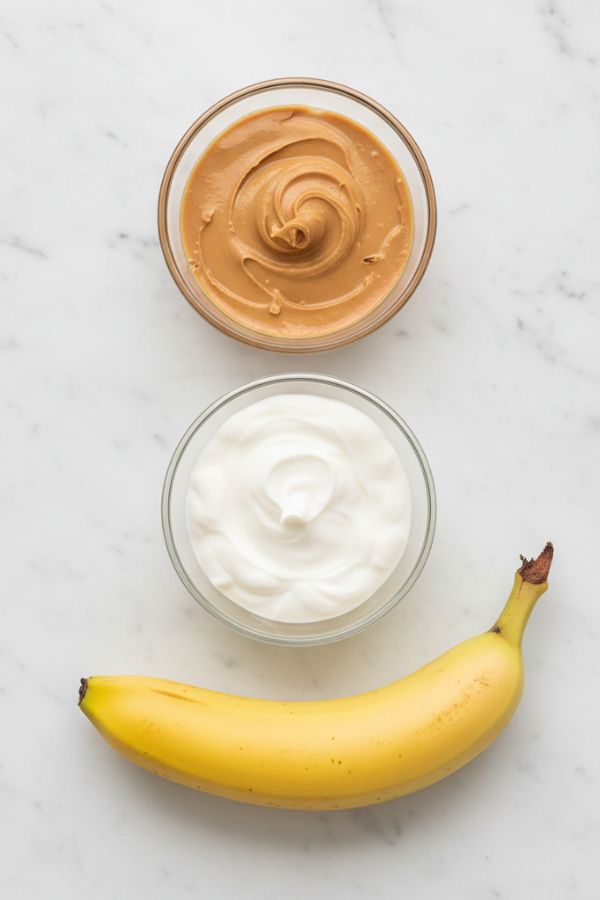
- 1/2 cup natural peanut butter (xylitol-free)
- 1/2 cup plain Greek yogurt
- 1 ripe banana (mashed)
Instructions
Step 1: Prep the Banana
Grab your ripe banana—it should be soft and brown-spotted for max sweetness and easy mashing. Peel it and drop it into a mixing bowl. Use a fork or potato masher to mash it thoroughly for 30–45 seconds until it’s silky smooth, with no lumps. Think baby food consistency—creamy and spoonable. If it’s too firm, microwave the peeled banana for 10 seconds to soften it up.
Step 2: Add Peanut Butter and Yogurt
To the mashed banana, add ½ cup natural peanut butter (triple-check it’s xylitol-free, as xylitol is toxic to dogs) and ½ cup plain Greek yogurt (unsweetened, no additives). Use a spoon or whisk to stir vigorously for 1–2 minutes until the mix looks like a thick milkshake. Scrape the sides of the bowl with a spatula to ensure everything’s blended. The mixture should be creamy and uniform, with no streaks of yogurt or peanut butter.
Step 3: Adjust the Consistency
Check the texture—it should be thick but pourable, like a smoothie you’d sip through a straw. If it’s too thick to pour easily, add a splash of water or goat milk (1 tsp at a time, up to 1 tbsp) and stir until it loosens up. Mix for 15–20 seconds after each addition to avoid making it too runny. If it’s too thin, add 1 tsp more peanut butter and stir. This ensures it freezes solid without being icy.
Step 4: Prep Your Molds
Get your silicone treat molds, ice cube trays, or mini muffin tin ready. Silicone molds with paw or bone shapes are peak pup vibes, but any mold works. If using ice cube trays, lightly spray with cooking spray and wipe off excess for easy release. For a no-mold option, line a baking sheet with parchment paper for dollops. Place molds on a flat surface to prevent spills during filling.
Step 5: Fill the Molds
Use a spoon or small measuring cup to scoop the mixture into each mold, filling them about ¾ full to allow for slight expansion when frozen. For mini muffin tins, fill halfway for smaller treats. Tap the tray gently on the counter to settle the mix and pop any air bubbles. If you want a fun twist, layer in a surprise: fill molds halfway, add a tiny dollop of peanut butter (about ¼ tsp per treat), then top with more mixture. Smooth the tops with a spoon for a clean finish.
Step 6: Freeze Until Solid
Carefully place the molds or baking sheet in the freezer on a flat shelf to keep everything level. Freeze for 3–4 hours minimum, or overnight for best results, until the treats are rock-hard. Smaller molds might set in 2.5–3 hours—check by pressing one; if it’s firm and doesn’t budge, you’re set. Don’t rush it, as soft treats can be messy to serve.
Step 7: Pop Out the Treats
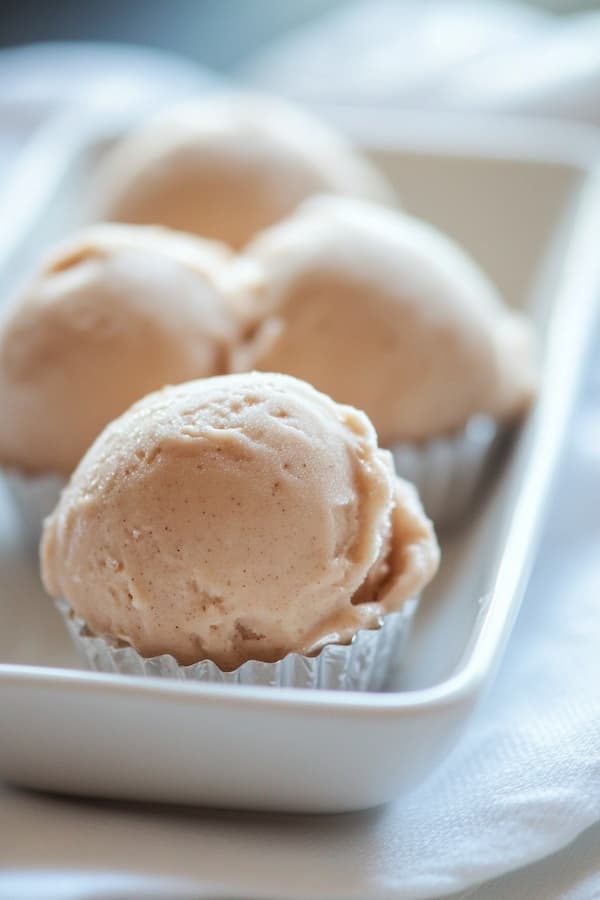
Once frozen, pop the treats out of the molds. For silicone molds, twist gently or push from the bottom to release. For ice cube trays, run the bottom under warm water for 5–10 seconds to loosen, then tap out. If using a baking sheet, peel dollops off the parchment paper. Pile the treats on a plate and get ready to make your pup’s day.
Step 8: Serve and Store
Serve one frozen treat to your pup as a cool, creamy snack—perfect for hot days or post-zoomies chill time. Watch them go to town!
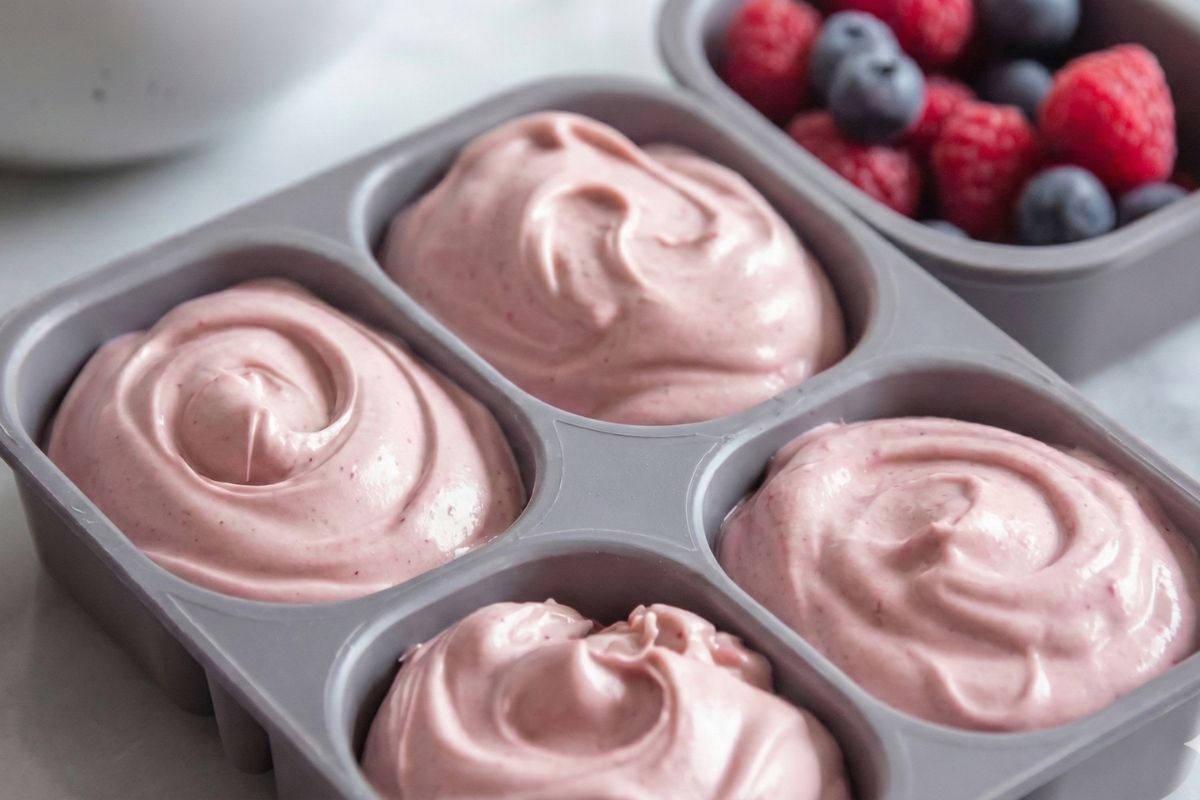
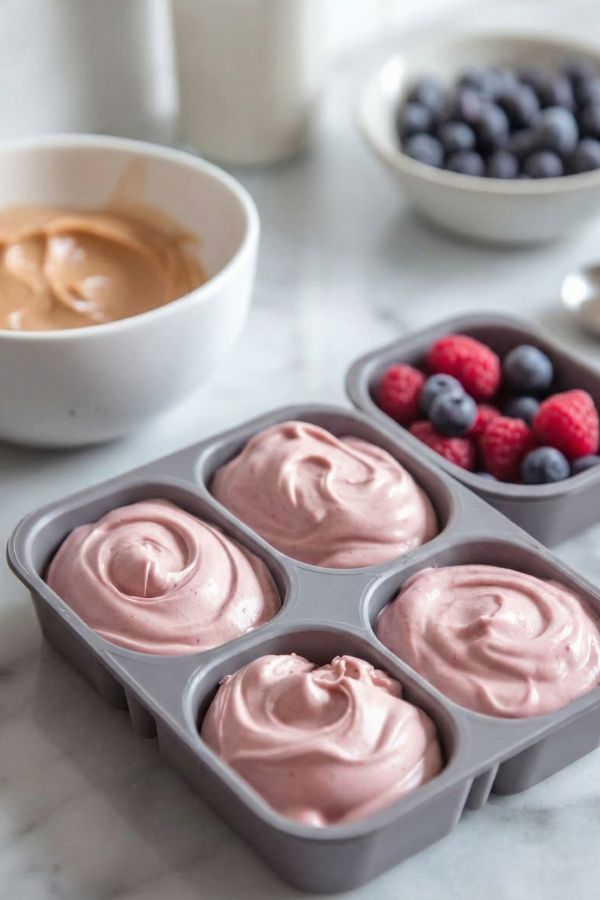
PB & Berry Swirl Pupsicles
Ingredients
- 1/2 cup plain Greek yogurt
- 2 tablespoons peanut butter
- 1/4 cup mashed strawberries or blueberries
Instructions
Step 1: Prep the Berries
Grab ¼ cup strawberries or blueberries (fresh or frozen). If using fresh, rinse and pat dry. For a smooth puree, toss them into a blender or food processor and pulse for 10–15 seconds until they’re a thick, jam-like consistency with no big chunks. If you’re going old-school, mash them in a bowl with a fork for 30–45 seconds until mostly smooth—small bits are fine for texture. Set the puree aside in a small bowl.
Step 2: Mix Yogurt and Peanut Butter
In a separate mixing bowl, combine ½ cup plain Greek yogurt (unsweetened, no additives) and 2 tbsp peanut butter (xylitol-free, critical for pup safety). Use a spoon or spatula to stir vigorously for 1–2 minutes until the mixture is fully combined and creamy, like a thick frosting. Scrape the sides to ensure no peanut butter hides out. If it’s too stiff, add 1 tsp water and mix again.
Step 3: Check the Mixture
Give the yogurt-peanut butter mix a quick stir and check its texture. It should be smooth and spreadable, like a thick dip. If it’s too thick to spoon easily, drizzle in 1 tsp water and stir for 10 seconds. If it’s too runny, add ½ tsp more peanut butter. This ensures it layers nicely with the berry puree in the next step.
Step 4: Prep Your Molds
Get your silicone molds or ice cube trays ready—silicone with paw or bone shapes is straight-up adorable. If using ice cube trays, lightly spray with cooking spray and wipe off excess to help with release. No molds? Line a baking sheet with parchment paper for freeform dollops. Place molds on a flat surface to avoid spills when filling.
Step 5: Layer the Mixtures
Time to get artsy! Spoon a small amount of the yogurt-peanut butter mixture into each mold, filling about ⅓ of the way (about 1 tsp per mold). Next, add a thin layer of berry puree (about ½….continued below
½ tsp) on top. Alternate layers until the molds are nearly full, leaving a tiny bit of space at the top. Aim for 2–3 layers total, depending on mold size. Don’t overfill to avoid mess.
Step 6: Swirl for Style
Grab a toothpick or butter knife and gently swirl the layers in each mold for a marbled effect. Move in a figure-8 or zigzag motion for 5–10 seconds per mold to blend the colors without fully mixing them. This gives that fancy, Instagram-worthy look. Wipe the toothpick between molds to keep it clean. If you skip swirling, you’ll get distinct layers, which is still cute.
Step 7: Freeze Overnight
Place the molds or baking sheet in the freezer on a flat shelf to keep them level. Freeze overnight (at least 8 hours) to ensure the pupsicles are completely solid. These are thicker than some treats, so they need the extra time to set properly. Check by pressing one—if it’s hard as a rock, you’re good.
Step 8: Pop Out and Serve
Once frozen, pop the pupsicles out by twisting silicone molds or running ice cube trays under warm water for 5–10 seconds to loosen. For baking sheet dollops, peel off the parchment paper. Serve one to your pup and let them savor it slowly (or inhale it in 5 seconds, no shade). These are perfect for hot days or just because your pup’s the best.
Step 9: Store the Extras
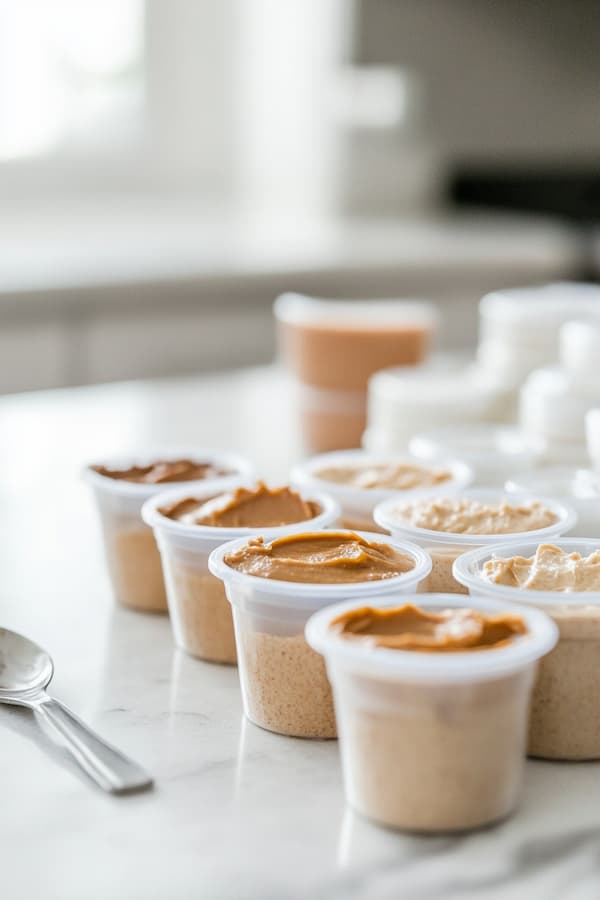
Transfer leftover pupsicles to a freezer-safe bag or airtight container. Store in the freezer for up to 2 weeks. If stacking, layer with parchment paper to prevent sticking. Check for freezer burn (frost or odd smells) before serving.
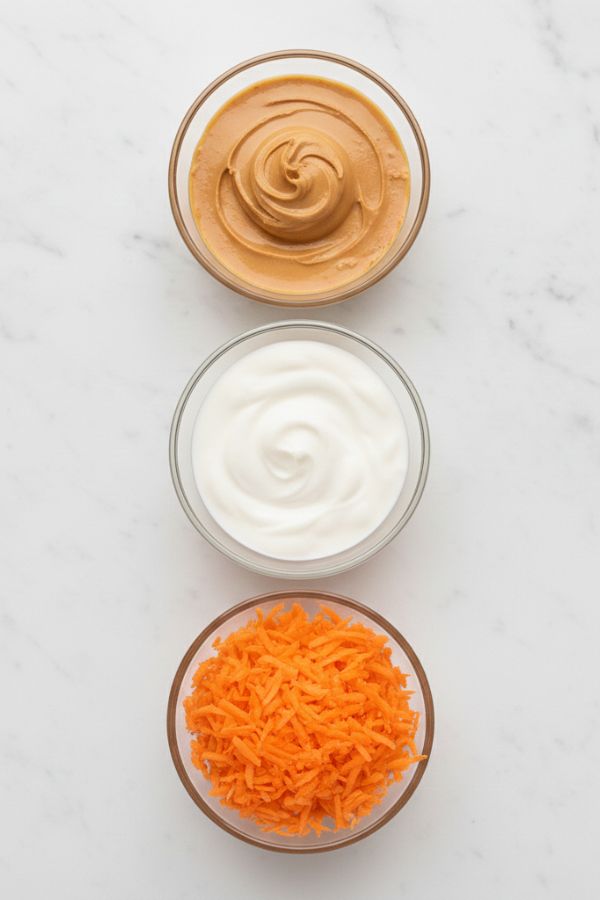
Frozen Kong Filling
Ingredients:
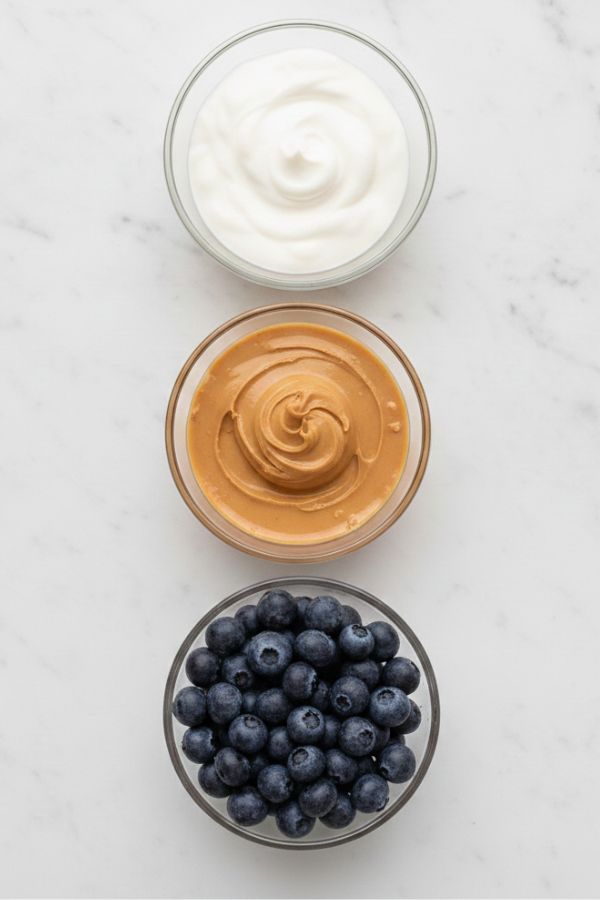
- 1/3 cup peanut butter
- 1/3 cup plain yogurt
- 1/3 cup finely grated carrot or mashed pumpkin
Instructions
Step 1: Prep the Veggie
Choose your veggie: finely grated carrot or mashed pumpkin. For carrots, peel and use the smallest holes on a grater to shred ⅓ cup—think tiny flecks for easy mixing and crunch. Takes about 1 medium carrot, grated for 30–45 seconds. For pumpkin, use pure canned pumpkin (not pie filling) or mash roasted pumpkin with a fork until smooth, like baby food. Measure ⅓ cup and set aside in a small bowl.
Step 2: Combine the Base Ingredients
In a mixing bowl, add ⅓ cup peanut butter (xylitol-free, critical for dog safety) and ⅓ cup plain yogurt (unsweetened, no additives). Use a spoon or spatula to stir for 1–2 minutes until the mix is smooth and creamy, like a thick dip. Scrape the sides to blend fully—no yogurt streaks allowed. The mixture should be thick but spreadable.
Step 3: Add the Veggie
Add your ⅓ cup grated carrot or mashed pumpkin to the peanut butter-yogurt mix. Stir for 30–45 seconds to evenly distribute the veggie. Carrots should add speckles and crunch; pumpkin should blend in for a uniform texture. If using carrots, ensure they’re fine enough to not clump. The final mix should look like a colorful, thick paste—carrot gives orange flecks, pumpkin makes it a solid hue.
Step 4: Check the Texture
Give the mixture a quick stir and check its consistency. It should be thick enough to stay in the Kong but soft enough to spoon or pipe. If it’s too stiff, add 1 tsp water and mix for 10 seconds. If it’s too runny, add 1 tsp more peanut butter. This ensures it freezes solid and doesn’t leak out during stuffing.
Step 5: Prep the Kongs
Grab your Kongs or other fillable toys—clean and dry them first. Standard Kongs work for most dogs, but use puppy or smaller sizes for little pups. Inspect for cracks to ensure they’re safe. Set them on a flat surface (a plate or cutting board works) to keep them upright during stuffing.
Step 6: Stuff the Kongs
Use a spoon to pack the mixture into each Kong, filling it to the top. For easier stuffing, transfer the mix to a piping bag or a Ziploc bag with a corner snipped off and pipe it in. Press gently with the spoon or your finger to fill all crevices, especially the small hole at the top. Tap the Kong lightly on the counter to remove air pockets and settle the mix. Aim to fill 2–3 Kongs, depending on size.
Step 7: Smooth and Clean
Once stuffed, use the back of a spoon or a finger to smooth the opening of each Kong for a clean finish. Wipe any excess mix off the outside with a damp paper towel to keep it neat. This helps the Kong freeze evenly and look pro when you serve it.
Step 8: Freeze Upright
Place the stuffed Kongs standing upright in the freezer—use a small container or cup to hold them steady if needed. Freeze for 4–5 hours minimum, or overnight for best results, until the filling is completely solid. Check by poking the top—if it’s hard, you’re good. Upright freezing prevents the mix from oozing out.
Step 9: Serve and Store
Pull a frozen Kong from the freezer and serve it cold to your pup. It’s perfect for mental stimulation, teething relief, or keeping them busy while you chill.
Serving Sizes & Frozen Treat Tips
While these frozen delights are a fantastic way to keep your pup cool, they are quite rich due to the peanut butter and yogurt. To keep your dog’s diet on track, please ensure that these treats (and all other snacks) make up no more than 10% of their total daily calorie intake.
Because yogurt contains dairy and peanut butter is high in healthy fats, it’s best to start with just one small cube or a partially filled toy to see how your dog’s digestive system handles the new texture. For smaller breeds, consider using mini-molds to keep the portions appropriate for their size!
Disclaimer
I love seeing pups enjoy these creamy frozen snacks, but I want to remind you that I am not a professional pet nutritionist. These recipes are meant to be a fun, occasional supplement and should not replace a balanced, complete meal plan.
It is always a good idea to contact your veterinarian before introducing new ingredients like Greek yogurt or berries, especially if your dog has a history of dairy sensitivity, weight concerns, or specific health conditions. Your vet can provide the best guidance on serving sizes tailored to your dog’s unique needs.
Most importantly, always double-check your labels to ensure your peanut butter is 100% xylitol-free, as this sweetener is toxic to dogs!
Freezer Tips & Treat Hacks
- Use parchment between layers to avoid sticking
- Thaw for 1–2 minutes for senior dogs or pups with sensitive teeth
- Make smaller portions for training or mini breeds
- Want to make it fancy? Sprinkle with shredded coconut or a few freeze-dried blueberries before freezing
Why Peanut Butter & Yogurt?
- Protein-packed and satisfying
- Yogurt is full of probiotics for digestion
- Peanut butter = the treat that never misses
- No baking. No stove. Just mix, freeze, and serve
- Dogs love the creamy texture (and let’s be honest—you’ll love how easy it is)
Final Thoughts
Peanut butter and yogurt are a match made in dog heaven—and when you freeze them into treats? You’ve officially reached top-tier dog mom status.
These frozen snacks are easy to make, easy to store, and guaranteed to make you your dog’s favorite person (again). Whether it’s summer heat or just snack o’clock, you’ve got the perfect recipes to keep things cool, creamy, and totally delicious.
Want a printable treat tag, recipe card, or batch freezer planner? I’m your girl—just bark once and I’ve got it ready.