
Whether it’s fireworks, thunderstorms, vet visits, or just everyday nerves, some dogs need a little help dialing down the drama. That’s where calming dog treats come in—not as a magic fix, but as a gentle, natural way to say, “Hey buddy, you’re safe. We’ve got this.”
These recipes are easy, homemade, and packed with ingredients known for their calming benefits—think chamomile, pumpkin, and melty peanut butter goodness. They’re perfect for anxious pups, senior dogs, or those “Velcro” types who get stressed when you walk to the bathroom without them.
Let’s make snack time a little more soothing.
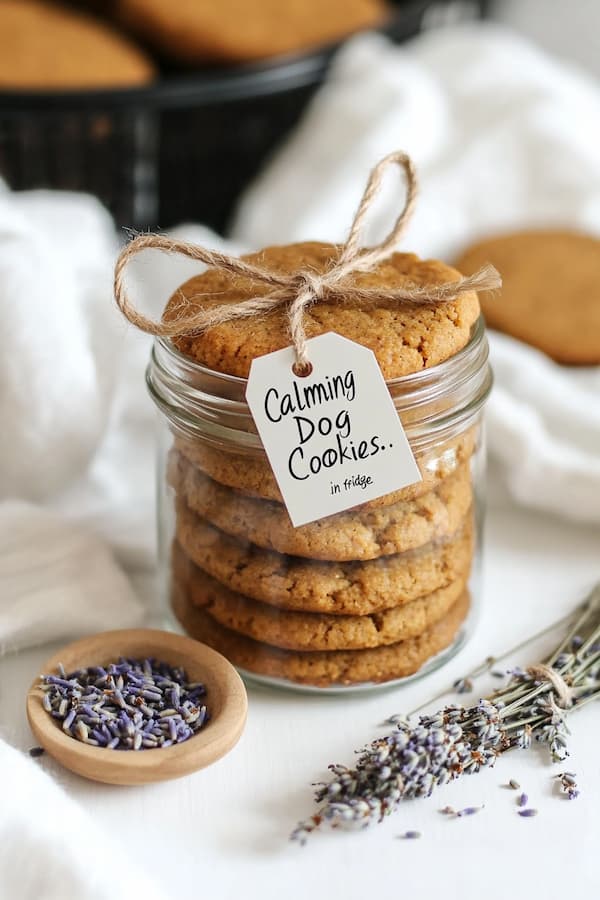
Calming Dog Treats
#1 Chamomile Peanut Butter Bites
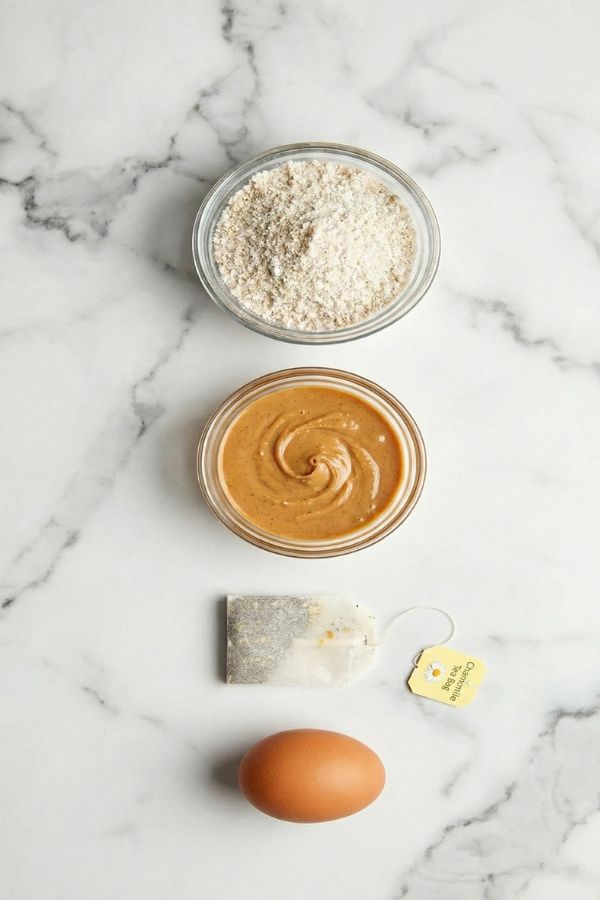
Ingredients:
- 1 cup oat flour (gluten-free if needed)
- 1/2 cup natural peanut butter (xylitol-free)
- 1 chamomile tea bag (steeped in 1/4 cup hot water, then cooled)
- 1 egg
Step 1: Steep and Cool the Chamomile Tea
Start by steeping your chamomile tea bag in 1/4 cup of hot water for about 5 minutes, allowing it to fully infuse. Chamomile is known for its natural calming properties—perfect for anxious pups.
Once steeped, remove the tea bag and let the tea cool completely. This ensures the egg in your recipe won’t cook prematurely and helps maintain dough consistency.
Tip: Brew the tea first so it has time to cool while you prep the other ingredients.
Step 2: Mix the Dough
In a medium mixing bowl, combine the oat flour, peanut butter, and egg. Pour in the cooled chamomile tea a little at a time while stirring.
Stir until the mixture forms a thick, pliable dough. It should feel sticky but workable—like playdough.
If it’s too dry, add a splash more tea. If too wet, sprinkle in a bit more flour.
Step 3: Shape the Treats
You have options here! Use your hands to roll the dough into small bite-sized balls (about 1–1.5 inches wide), or press the dough into silicone molds for fun shapes.
Line them up on a parchment-lined baking sheet, leaving a little space between each.
Step 4: Bake to Perfection
Preheat your oven to 325°F (160°C). Bake the treats for 20–25 minutes, depending on the size and shape.
The treats should be firm to the touch and lightly golden around the edges. They’ll firm up more as they cool.
For crunchier bites, bake a few minutes longer or let them sit in the warm oven after turning it off.

Step 5: Cool and Store
Let the treats cool completely on a wire rack before serving. This step is essential for texture and safety—especially since warm peanut butter can hold heat.
Store in an airtight container in the fridge for up to 1 week, or freeze for up to 2 months. Thaw before serving or serve chilled for a refreshing twist.
#2 Pumpkin Banana Chill Cookies

Ingredients:
- 1/2 cup canned pumpkin (plain, not pie filling)
- 1/2 ripe banana (mashed)
- 1 cup oat flour
- 1 tsp ground flaxseed (optional, for fiber and omega-3s)
- Optional: A pinch of dried lavender or valerian root powder (for calming effects – use sparingly)
Step 1: Mash the Banana and Mix with Pumpkin
In a medium mixing bowl, mash the ripe banana thoroughly using a fork or spoon until smooth. Add the canned pumpkin and stir until the mixture becomes creamy and well combined.
Tip: Ripe bananas add natural sweetness and moisture, making the cookies soft and appealing to dogs.
Step 2: Stir in Dry Ingredients
Gradually add the oat flour and optional ground flaxseed to the wet mixture. Stir until fully incorporated and a thick dough forms.
If using lavender or valerian root powder, sprinkle in just a tiny pinch—these herbs have calming properties, but a little goes a long way for dogs.
Step 3: Shape and Flatten the Cookies
Using a small spoon or cookie scoop, drop spoonfuls of dough onto a baking sheet lined with parchment paper or a silicone mat.
Gently flatten each one with the back of a spoon or your fingers. Aim for cookie shapes about 1.5 inches wide—perfect for pups of all sizes.
Step 4: Bake Until Set
Preheat your oven to 325°F (160°C). Bake the cookies for 20–22 minutes, or until the edges are firm and lightly golden. The centers should remain soft and slightly chewy.
For softer cookies (ideal for senior dogs or sensitive teeth), bake for 18–19 minutes.
Step 5: Cool and Store
Let the cookies cool completely on a wire rack before storing. This helps set their final texture and prevents condensation in storage containers.
Store in an airtight container in the refrigerator for up to 5 days, or freeze for up to 2 months for longer freshness.
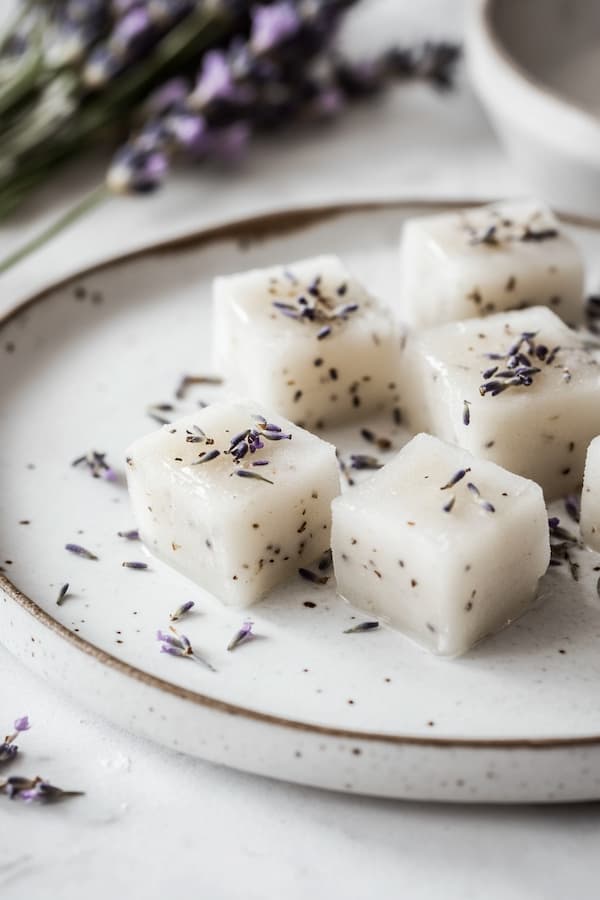
#3 Frozen Lavender Oat Cubes
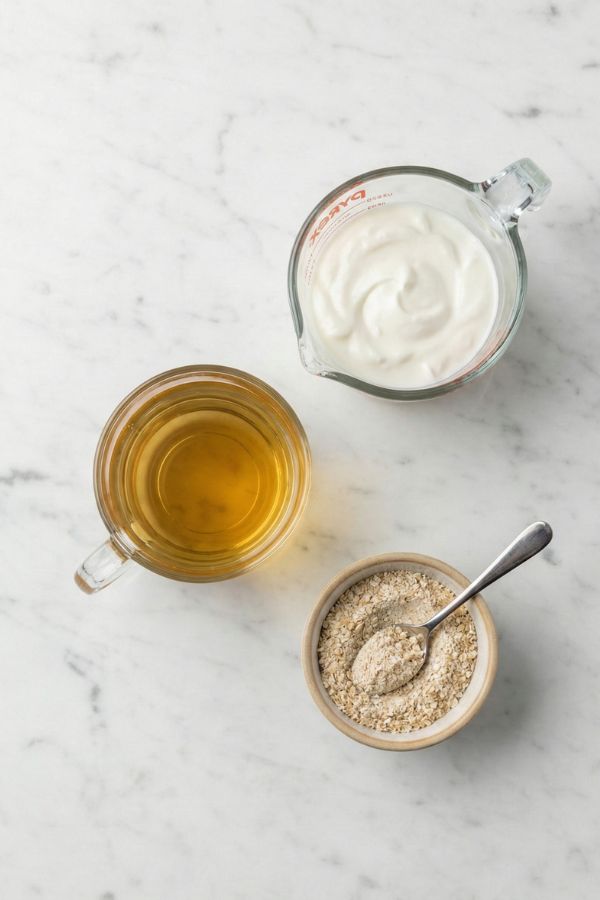
Ingredients:
- 1/2 cup plain Greek yogurt (unsweetened, no flavors)
- 1/2 cup brewed lavender or chamomile tea (fully cooled)
- 1 tbsp ground oats (for texture and mild fiber boost)
- Optional: 1 tsp honey (only for dogs over 1 year old and if they’re picky eaters)
Step 1: Brew and Cool the Tea
Start by brewing lavender or chamomile tea—both are known for their natural calming properties.
Let the tea cool completely to room temperature. Never add hot liquids to yogurt, as it can curdle or affect texture.
Note: Use pure tea with no additives or sweeteners. Let the tea steep for 5–7 minutes for full flavor and benefit.
Step 2: Blend All Ingredients Together
In a blender or food processor, combine the cooled tea, Greek yogurt, and ground oats. If your pup needs encouragement to try new flavors, you can add a small spoonful of honey for a touch of sweetness.
Blend until smooth and creamy—the consistency should be pourable but not too thin.
Step 3: Pour into Molds
Pour the mixture into silicone treat molds, ice cube trays, or even small paper cups. Choose fun shapes to make treat time more playful!
Step 4: Freeze Until Firm
Place the tray in the freezer and let the treats freeze for 3–4 hours, or overnight for best results. You’ll know they’re ready when they pop out easily and hold their shape.
Tip: If using paper cups, peel them off before serving for a neater presentation.
Step 5: Serve and Store
Serve one cube at a time for a calming, cooling treat. These are especially helpful:
- Before nap time
- During fireworks or thunderstorms
- After a vet visit
- On hot summer days
Store the cubes in a freezer-safe container or bag for up to 2 months. Label with the flavor and date for easy rotation.
Suggested Serving Sizes
While these snacks are designed to help your pup chill out, they are still treats! To keep your dog’s diet balanced, make sure all snacks combined do not exceed 10% of their daily calorie intake.
Every dog is different, so start with a small piece to see how they handle the new ingredients, especially the calming herbs.
A Friendly Heads-Up
I love sharing these soothing recipes, but please remember that I am not a professional canine nutritionist. These treats are meant to be a natural supplement to help with relaxation, not a medical cure for severe anxiety.
Please consult your veterinarian before introducing new ingredients like chamomile, lavender, or valerian root, especially if your dog is on medication, is pregnant, or has a pre-existing health condition. If you’re ever unsure about a specific ingredient or the right portion size for your pup’s weight, your vet is always the best person to ask!
When to Use Calming Treats
Calming treats aren’t a quick fix—but when used intentionally and consistently, they can be super effective as part of your dog’s relaxation routine. The key is timing and pairing them with calming cues your dog can learn to trust.
Try giving calming treats 30–60 minutes before any of the following:
- Thunderstorms or fireworks – Start early, before the first boom. Calming treats work best before anxiety spikes.
- Car rides or vet visits – If your pup gets shaky in the car or at the clinic, a treat ahead of time can help take the edge off. Bonus points if you pair it with a favorite toy or calming music.
- Leaving for work – For dogs with separation anxiety, calming treats can become part of the “you’ll be okay” routine. Offer the treat calmly, without a dramatic goodbye.
- Bedtime wind-down – Some pups are natural night owls. A calming treat before bed can help ease restlessness, especially when paired with low lights and quiet snuggles.
- Unexpected guests, loud environments, or big changes – Anytime your dog’s environment shifts in a way that might trigger nervous energy, calming treats can serve as a comfort anchor.