If you’re looking for a fast, flexible, and dog-safe way to make homemade treats, baby food dog treats are a game changer. Many store-bought baby foods contain just one or two simple ingredients—like pureed meat, fruits, or vegetables—making them a safe, gentle, and easy-to-use base for dog-friendly snacks.
These treats are especially great for dogs with food sensitivities, picky eaters, or senior dogs who need softer textures. With minimal prep and a few wholesome add-ins, you can turn store-bought baby food into homemade treats your dog will absolutely love.
Baby Food Dog Treats
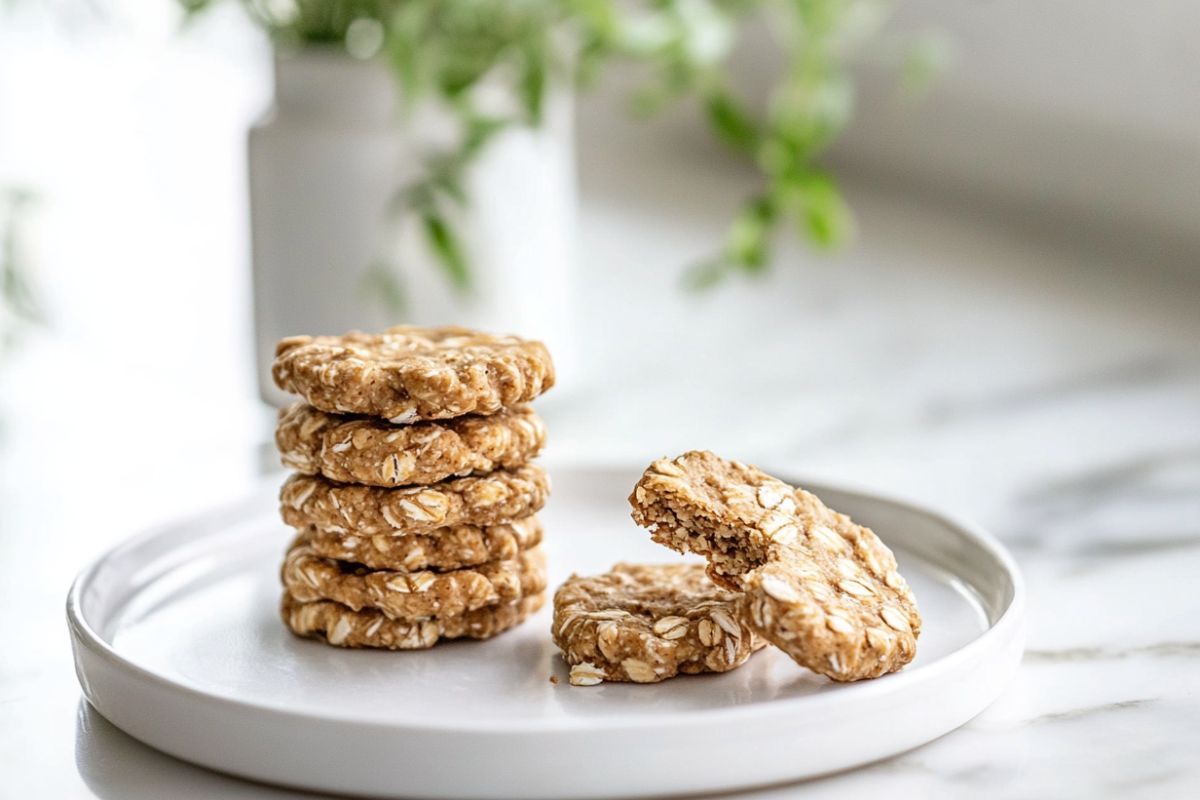
#1 Chicken & Oat Soft Bites
Ingredients
- 1 jar (4 oz) plain chicken baby food (no added salt or garlic/onion)
- 1 cup rolled oats (or quick oats)
- 1 egg

Instructions
Step 1: Preheat the Oven
Set your oven to 350°F (175°C) to get it ready. Grab a baking sheet and line it with parchment paper or a silicone baking mat to prevent sticking and make cleanup easy. Place the sheet on your counter so it’s ready for action.
Step 2: Combine Wet Ingredients
In a medium mixing bowl, scoop in 1 jar (4 oz) plain chicken baby food (ensure no salt, garlic, or onion). Crack 1 egg into the bowl. Whisk them together with a fork or whisk for 30–45 seconds until fully blended, creating a smooth, creamy base with no egg streaks.
Step 3: Add the Oats
Pour 1 cup rolled oats (or quick oats) into the wet mixture. Stir with a spoon for 1–2 minutes until you get a thick, sticky dough that holds together. Scrape the sides to mix evenly. Let the dough rest for 2–3 minutes to allow the oats to absorb moisture, making it easier to shape.
Step 4: Check Dough Consistency
Check the dough’s texture—it should be sticky but moldable, like a soft cookie dough. If it’s too wet and sticks to your hands, sprinkle in 1 tbsp more oats and mix. If it’s too dry and crumbly, add 1 tsp water and stir. This ensures the dough is workable for shaping.
Step 5: Scoop and Shape
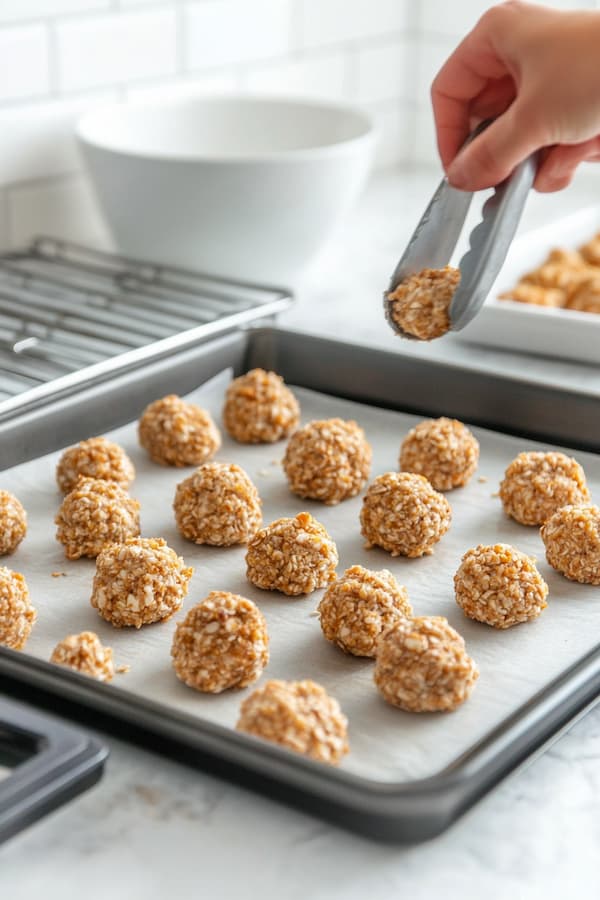
Use a teaspoon or your fingers to scoop small amounts of dough (about 1 tsp each). Roll into small balls or flatten gently into mini patties, about ½-inch thick. Make them bite-sized for training or quick snacking, aiming for 20–25 bites. Place them on the prepared baking sheet, spacing ½ inch apart.
Step 6: Bake the Bites
Slide the baking sheet into the oven on the middle rack. Bake for 18–20 minutes, until the bites are set with light golden edges. For a slightly firmer texture, add 2–3 extra minutes, but keep them soft for easy chewing. Check by pressing one—it should feel firm but not hard.
Step 7: Cool on the Sheet
Remove the baking sheet from the oven and let the bites cool on it for 5 minutes to set. This helps them hold their shape. Use a spatula to gently lift them off to avoid sticking.
Step 8: Finish Cooling
Transfer the bites to a wire rack to cool completely, about 20–30 minutes. Full cooling prevents moisture buildup, keeping them fresh longer. Don’t serve warm, as hot treats can upset pup tummies.
Step 9: Store and Serve
Serve one or two bites to your pup as a soft, savory treat. Store in an airtight container in the fridge for up to 5 days or freeze for up to 3 months. Thaw frozen bites in the fridge overnight before serving.
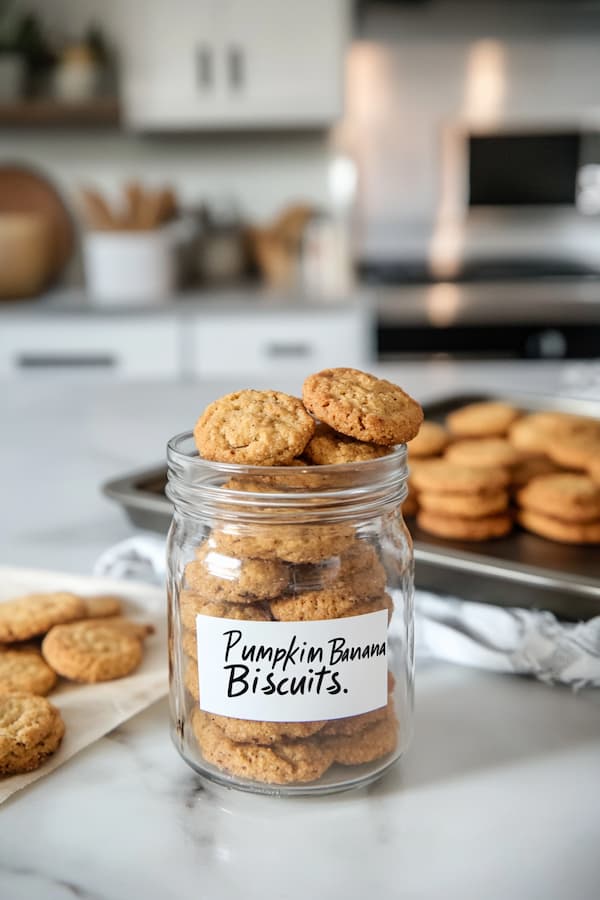
#2 Banana & Pumpkin Baby Biscuit Bites
Ingredients
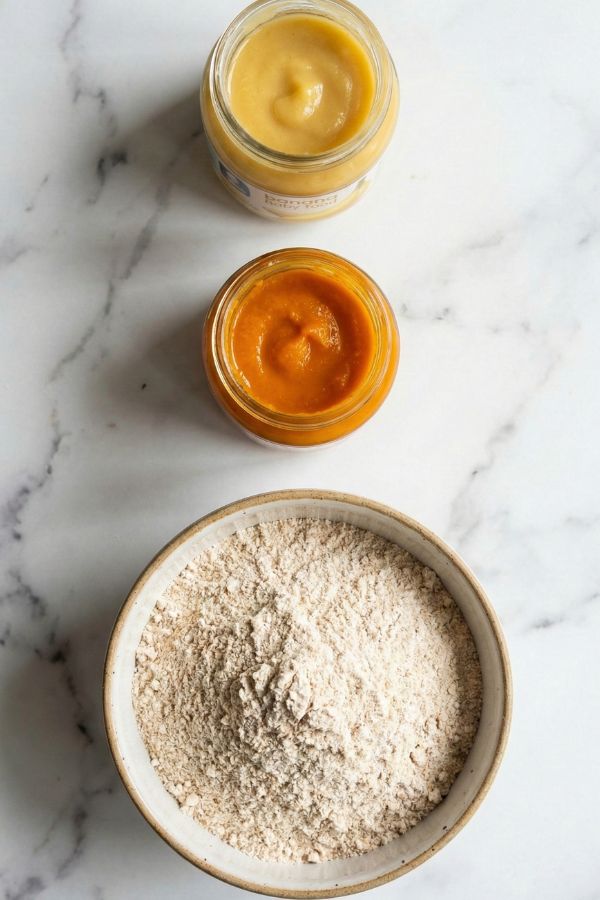
- 1 jar banana baby food
- 1 jar pumpkin baby food (or use 1/2 cup plain canned pumpkin)
- 1 ½ cups whole wheat or oat flour
Instructions
Step 1: Preheat the Oven
Set your oven to 325°F (160°C) to warm up. Grab a baking tray and line it with parchment paper or a silicone mat to prevent sticking. Prepare a clean surface for rolling and dust it lightly with flour (whole wheat or oat) to make dough handling easier.
Step 2: Mix Wet Ingredients
In a large mixing bowl, combine 1 jar banana baby food and 1 jar pumpkin baby food (or ½ cup plain canned pumpkin, not pie filling). Stir with a spoon for 30–45 seconds until smooth and well blended, with no streaks of banana or pumpkin. Scrape the sides to ensure it’s uniform.
Step 3: Add the Flour
Gradually add 1 ½ cups whole wheat or oat flour to the wet mixture, stirring with a spoon or your hands. Mix for 1–2 minutes until a soft, pliable dough forms. It should be non-sticky and easy to roll. If it’s too sticky, add 1 tbsp more flour at a time and mix until workable.
Step 4: Check Dough Texture
Knead the dough lightly in the bowl for 10–15 seconds to ensure it’s uniform. Pinch a piece—it should feel like soft playdough, not crumbly or tacky. If it’s too dry, add 1 tsp water and knead. This ensures it rolls out smoothly without cracking.
Step 5: Roll Out the Dough
Place the dough on the floured surface. Use a rolling pin to roll it out to about ¼ inch thick. Too thin, and the biscuits burn; too thick, and they stay soft. Dust with a tiny bit more flour if it sticks, but don’t overdo it to keep the texture right.
Step 6: Cut Shapes
Use bone-shaped cookie cutters or a knife to cut out treat-sized pieces. Aim for small biscuits, about 1–2 inches long, for easy snacking. Alternatively, roll the dough into logs and slice into ¼-inch thick coins. Gather scraps, re-roll, and cut until all dough is used, making about 25–30 biscuits.
Step 7: Arrange on Tray
Place the cut biscuits on the prepared baking tray, spacing them ½ inch apart—they won’t spread much. Press gently to ensure they’re flat for even baking. If you want a smoother look, lightly smooth edges with damp fingers.
Step 8: Bake the Biscuits
Slide the tray into the oven on the middle rack. Bake for 20–25 minutes, until the edges are lightly golden and firm. For crispier treats, flip halfway through at 10 minutes or leave in the warm oven for 5–10 extra minutes after turning it off.
Step 9: Cool Completely
Remove the tray and transfer biscuits to a wire rack to cool completely, about 30–40 minutes. Full cooling helps them firm up and store better, preventing moisture buildup. Don’t serve warm to avoid tummy issues.
Step 10: Store and Serve
Serve one or two biscuits to your pup as a crunchy treat. Store in an airtight container in the fridge for up to 7 days or freeze for 3 months. Thaw frozen biscuits in the fridge before serving
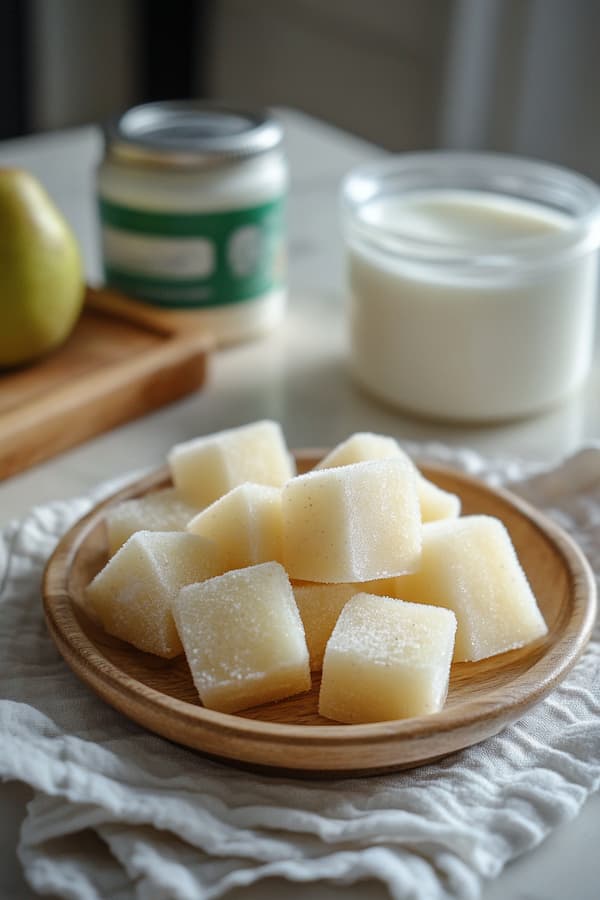
#3 Fruity Frozen Baby Food Cubes
Ingredients
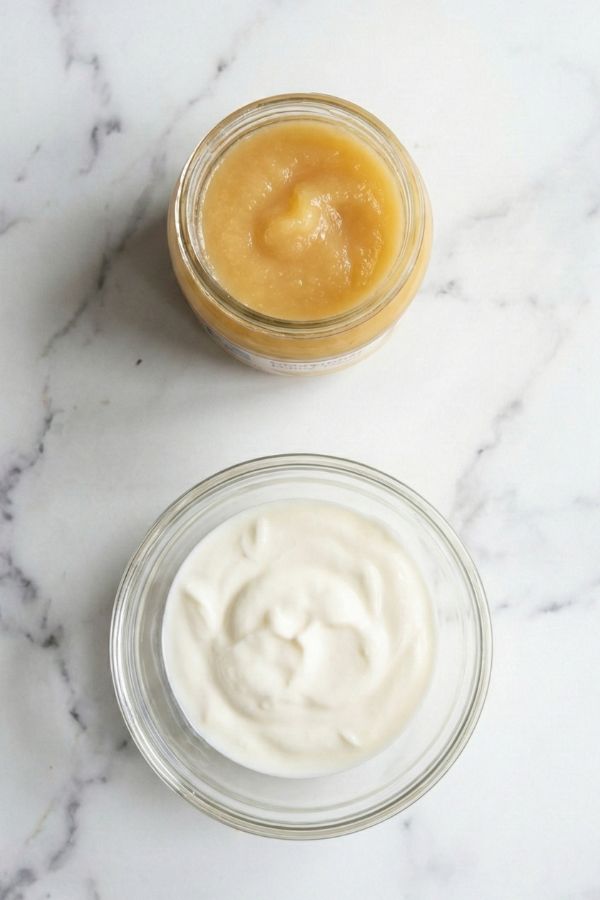
- 1 jar apple, blueberry, or pear baby food
- 1/2 cup plain Greek yogurt (unsweetened)
- Optional: 1 tsp ground flaxseed or 1 tbsp finely shredded carrot
Instructions
Step 1: Choose and Prep Ingredients
Select 1 jar (4 oz) apple, blueberry, or pear baby food (no added sugar, flavors, or preservatives). Pour it into a mixing bowl. Add ½ cup plain Greek yogurt (unsweetened, no additives). If using, measure 1 tsp ground flaxseed or 1 tbsp finely shredded carrot (grate carrot with the smallest grater holes for tiny flecks).
Step 2: Mix the Ingredients
Stir with a spoon for 1–2 minutes until the mixture is smooth and uniform, like a creamy puree. Ensure the baby food and yogurt are fully blended with no streaks. If using flaxseed or carrot, fold them in gently to distribute evenly. The mix should be pourable but not runny.
Step 3: Check the Consistency
Check the mixture’s texture—it should be thick but fluid, like a smoothie. If it’s too thick to pour, add 1 tsp water and stir for 10 seconds. If it’s too thin, add 1 tsp more yogurt and mix. This ensures it freezes solid without being too icy.
Step 4: Prep Your Molds
Get silicone ice cube trays, treat molds, or mini muffin tins ready—silicone is best for easy release. If using metal trays, lightly spray with cooking spray and wipe off excess. Place on a flat surface to prevent spills during filling.
Step 5: Fill the Molds
Spoon or pour the mixture into each mold, filling them about ¾ full to allow for slight expansion. Use a spatula to scrape the bowl and get every bit. Tap the tray gently on the counter to settle the mix and remove air bubbles. Aim for 10–15 small cubes, depending on mold size.
Step 6: Freeze for 3–4 Hours
Place the molds in the freezer on a flat shelf to keep them level. Freeze for at least 3–4 hours, or overnight for best results, until the cubes are completely firm. Check by pressing one—if it’s solid and doesn’t give, you’re set.
Step 7: Pop Out the Cubes
Once frozen, pop the cubes out by twisting silicone molds or running metal trays under warm water for 5–10 seconds to loosen. Gently press the bottom of each mold to release. Collect the cubes in a pile for storing.
Step 8: Store in Freezer
Transfer the cubes to a freezer-safe bag or airtight container, labeled “Dog Treats” to avoid mix-ups with human snacks. Store in the freezer for up to 2 weeks. If stacking, layer with parchment paper to prevent sticking.
Step 9: Serve Chilled
Serve 1–2 cubes to your pup as a chilled treat, perfect for warm days or enrichment. Stuff them into puzzle toys for extra fun. Limit to a few cubes weekly, depending on pup size, to keep it balanced.
Portioning & Feeding Guidelines
Using baby food is a brilliant shortcut, but remember that these purees can be more concentrated in natural sugars or proteins than whole foods.
To keep your dog’s diet in check, these treats should be served as a supplement and should not exceed 10% of their total daily calorie intake.
Because these treats are often softer or more palatable, it’s easy to over-serve! Start with one small bite to ensure the specific fruit or meat puree agrees with your dog’s digestion.
For senior dogs or those with sensitive teeth, these soft-baked versions are perfect, but be sure to adjust their main meal portions if you’re using these as frequent rewards.
A Little Disclaimer
I love how easy these are for busy dog parents, but please keep in mind that I am not a professional pet nutritionist. These recipes are intended as a fun, convenient way to treat your pup and are not a replacement for a complete and balanced diet.
It’s always a good idea to chat with your vet before introducing baby food into your dog’s routine, especially if they have underlying health conditions like diabetes or specific food allergies. Your vet can help you determine the right serving size based on your dog’s weight and nutritional needs.
Most importantly, always read the baby food labels—double-check that there is absolutely no onion, garlic, or added salt hiding in the ingredients!
Storage Tips for Baby Food Dog Treats
- Soft-baked treats: Store in the fridge in an airtight container for up to 5 days. Freeze extras for up to 2 months.
- Crunchy biscuits: Store in a dry, sealed container at room temperature for 5–7 days. For longer shelf life, refrigerate.
- Frozen cubes: Keep in the freezer for up to 2 months. Label each batch with the date and flavor.
Why Use Baby Food in Dog Treats?
- Simple ingredients – Many baby foods are made from just one thing (like pureed sweet potato or chicken)
- Easy to digest – Great for sensitive stomachs or post-illness feeding
- Convenient and shelf-stable – No chopping, boiling, or pureeing required
- Versatile – Pairs easily with oats, flour, and other dog-safe ingredients
Important: Always check the label—avoid baby food with onion, garlic, added salt, or artificial sweeteners like xylitol, all of which are toxic to dogs.
FAQs About Baby Food Dog Treats
Can dogs eat baby food safely?
Yes, as long as it contains dog-safe ingredients—avoid onion, garlic, xylitol, and added salt.
What kind of baby food should I use for dog treats?
Stick to plain meat, fruit, or veggie purees with no additives or preservatives.
Can I mix baby food flavors together?
Totally! Just make sure all ingredients are dog-safe and compatible.
Conclusion
Who knew baby food could be your secret weapon for homemade dog treats? With just a jar or two and a few pantry staples, you can whip up soft bites, crunchy biscuits, or frozen snacks your dog will drool over. Easy, gentle on the tummy, and endlessly customizable—these baby food treats prove that great things come in tiny jars.