Training a dog is part art, part science—and all about the treats.
Dog Training Treats aren’t just snacks—they’re your secret weapon. The “yes, you did it!” in bite-sized form. These little rewards keep your pup focused, motivated, and ready to show off their best sit, stay, or high-five (because yes, that’s a thing).
But not all treats are created equal. You need something tasty, easy to handle, and small enough for frequent rewards without turning your training session into a full-on buffet.
Good news: I’ve got just the thing. Simple, healthy, and totally tail-wag-worthy. Let’s make training delicious.
Dog Training Treats
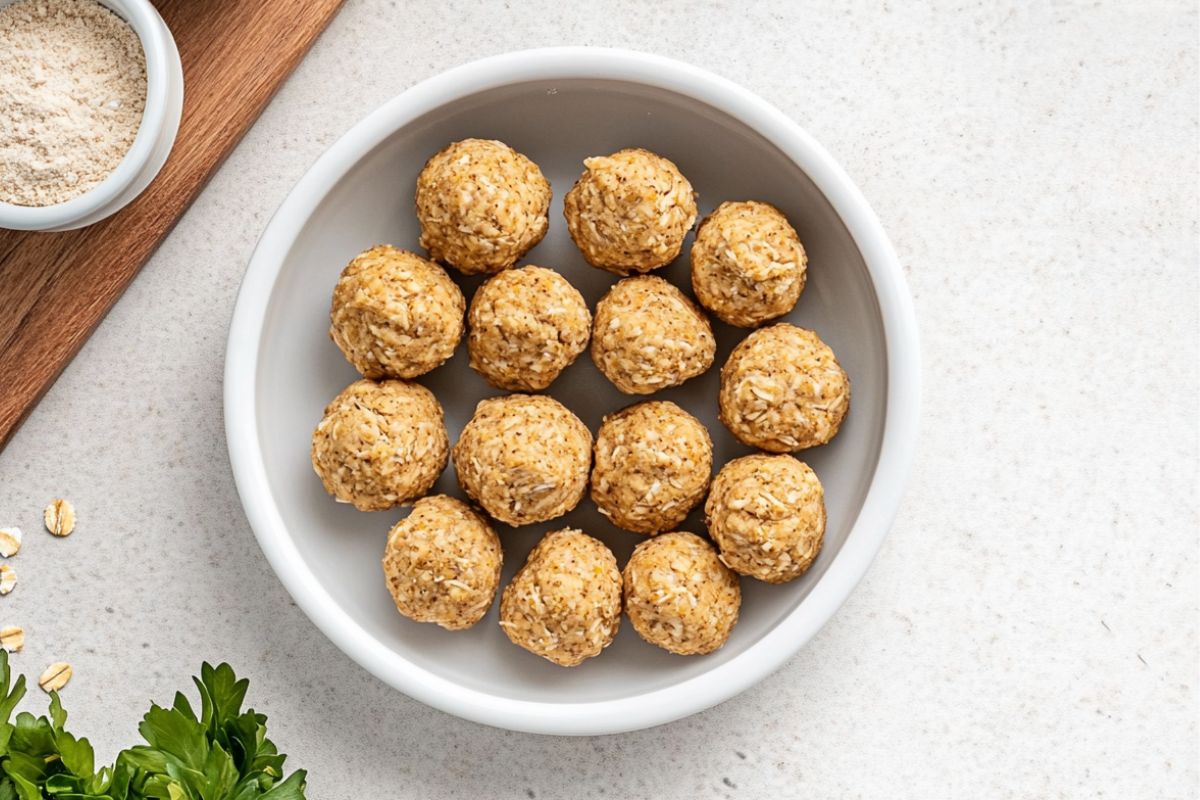
Simple Chicken Training Bites
Ingredients:
- 1 cup cooked chicken breast (finely chopped or shredded — plain, with no added salt, oil, or seasoning)
- 1 egg (acts as a binder and adds protein)
- 1/2 cup oat flour or whole wheat flour (choose oat flour for gluten-free dogs or whole wheat for extra fiber)
Instructions:
Step 1: Preheat the Oven
Preheat your oven to 350°F (175°C). Line a baking sheet with parchment paper or a silicone baking mat to prevent sticking and make cleanup easy.
Step 2: Prepare the Chicken
If you haven’t already, cook your chicken breast by boiling, baking, or steaming — without any seasoning.
Once fully cooked, cool it slightly, then finely chop or shred. The smaller the pieces, the easier they’ll be to mix and form into small treats.
Step 3: Mix the Ingredients
In a medium mixing bowl, whisk the egg until well beaten.
Add the shredded chicken and flour. Mix everything with a fork or spatula until a thick, sticky dough forms.
- If too dry: Add a splash of water or a bit more egg
- If too wet: Sprinkle in a little more flour
Step 4: Shape the Treats
Transfer the dough to a floured surface, or work directly from the bowl.
- Roll the dough to about 1/4-inch thickness and cut into tiny squares using a knife or pizza cutter
- Or pinch off small pieces and roll into mini balls or discs with your fingers
Aim for bite-sized pieces that your dog can chew quickly during training.
Step 5: Bake the Treats
Arrange the pieces on your prepared baking sheet, leaving a bit of space between each.
Bake for 12–15 minutes, or until the treats are set and slightly golden on the edges. They should be firm but still soft enough for chewing.
Step 6: Cool Completely
Let the treats cool on the baking sheet for a few minutes, then transfer them to a wire rack to cool completely.
This step prevents moisture build-up, which can lead to sogginess during storage.
Step 7: Store and Serve
Once fully cooled, store the treats in an airtight container in the refrigerator for up to 5 days.
You can also freeze in small batches for up to 2 months. Thaw before serving or offer cold for a refreshing reward.
Why These Treats Are Perfect for Training
These simple, protein-rich chicken treats are ideal for quick rewards during training. Made with just three ingredients, they’re easy to digest, low in fat, and easy to customize. Because they’re soft and small, they’re perfect for puppies, seniors, or dogs with sensitive teeth—and you can make them in big batches to freeze for later use.
Tuna & Cheese Training Cubes
Ingredients:
- 1 can tuna in water (drained — packed in water only, no added salt or oil)
- 1 egg (helps bind the ingredients and adds protein)
- 1/4 cup shredded cheese (cheddar or mozzarella — adds flavor and extra motivation)
- 1/2 cup whole wheat flour or oat flour (provides structure — choose oat flour for a gluten-free version)
Instructions:
Step 1: Preheat the Oven
Preheat your oven to 325°F (160°C). Lightly grease a small baking dish, such as a loaf pan or square pan, to prevent sticking.
Step 2: Combine the Ingredients
In a mixing bowl, mash the drained tuna with a fork until it’s flaky.
Add the egg and mix thoroughly, then stir in the shredded cheese and flour. The mixture should form a thick, sticky dough-like consistency.
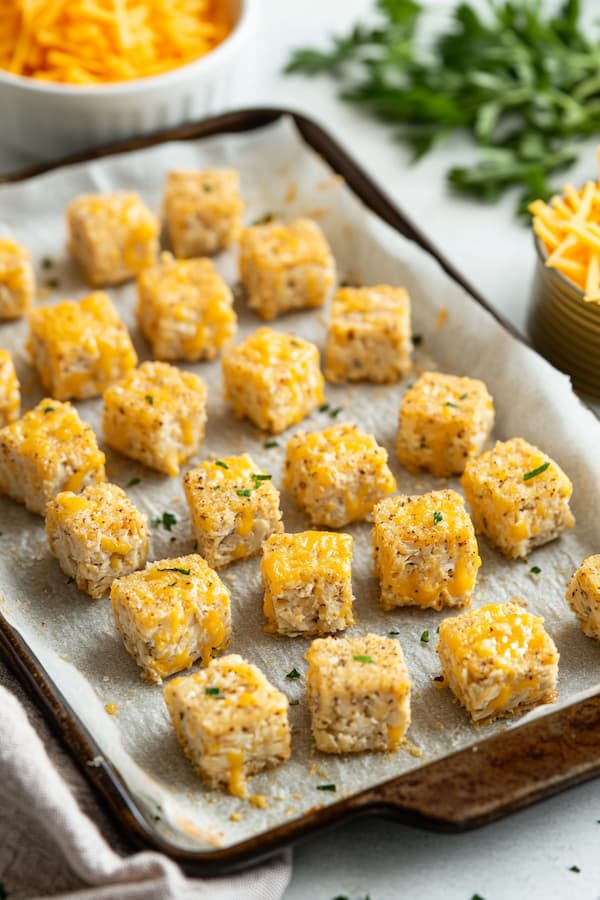
Step 3: Pour and Flatten
Spoon the mixture into your greased baking dish and use a spatula or the back of a spoon to flatten the surface evenly for consistent baking.
Step 4: Bake
Place in the oven and bake for 20–25 minutes, until the edges turn golden and the center is firm to the touch.
The slab should hold together when gently pressed.
Step 5: Cool and Cut
Allow the baked treat to cool completely in the pan.
Once cooled, remove it from the pan and cut into tiny cubes — perfect for training rewards.
Step 6: Store Properly
Store the treats in an airtight container in the refrigerator for up to 5 days.
For longer storage, freeze in small batches and thaw as needed before serving.
Why Tuna Treats Are Great for Training
These high-reward tuna treats are rich in omega-3 fatty acids, protein, and flavor—making them irresistible for most dogs. Their strong scent and soft texture make them ideal for training sessions, picky eaters, or dogs that need an extra nudge to focus.
Peanut Butter Banana Training Treats

Ingredients:
- 1 ripe banana (mashed — soft and sweet, ideal for binding and flavor)
- 1/4 cup natural peanut butter (xylitol-free only — always double-check the label)
- 1/2 cup oat flour (or finely ground rolled oats — gentle on digestion and gluten-free)
Instructions:
Step 1: Preheat the Oven
Preheat your oven to 350°F (175°C). Line a baking sheet with parchment paper or a silicone mat for easy cleanup.
Step 2: Mash the Banana
In a mixing bowl, mash the banana with a fork until it becomes completely smooth.
Ripe bananas are best—they mash easily and offer natural sweetness.
Step 3: Mix in the Peanut Butter
Add the natural peanut butter to the mashed banana and stir until fully combined.
The mixture should be smooth and creamy. Be sure the peanut butter is xylitol-free, as even small amounts of xylitol are toxic to dogs.
Step 4: Add Flour and Form a Dough
Gradually stir in the oat flour until the mixture turns into a soft, moldable dough.
- Too sticky? Add a bit more flour
- Too dry? Add a little water or mashed banana
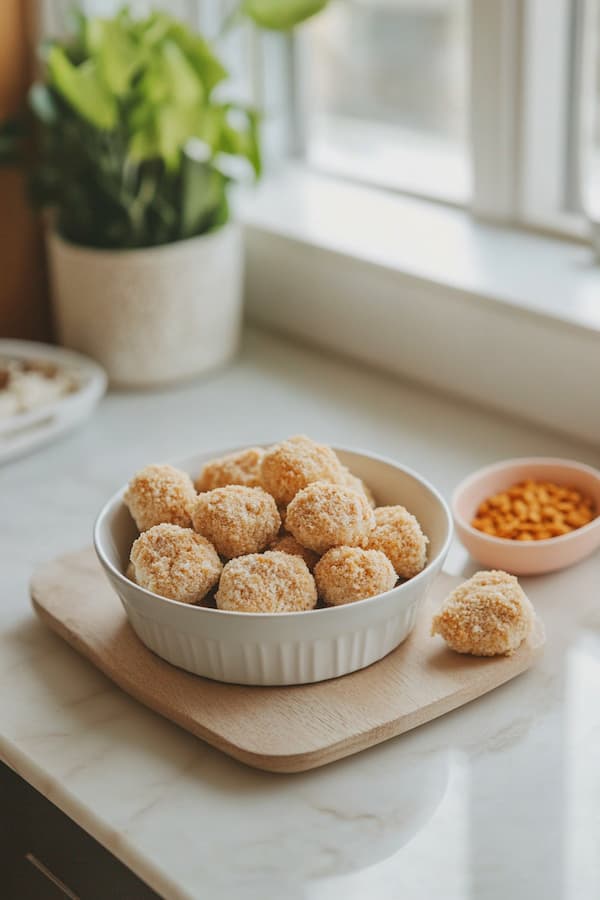
Step 5: Shape the Treats
Pinch off small pieces and roll into mini balls or flatten into discs.
You can also roll out the dough and use cookie cutters or slice into pea-sized squares for training.
Step 6: Bake
Bake for 12–15 minutes, depending on the texture you want:
- 12 minutes for softer, chewier treats
- 15 minutes for firmer bites
Step 7: Cool and Store
Let the treats cool completely on a wire rack before storing.
Keep in an airtight container in the fridge for up to 7 days, or freeze extras for up to 2 months.
Why These Treats Are a Dog Favorite
With just three pantry staples, these treats are packed with natural sweetness, healthy fats, and fiber. They’re easy to shape, soft enough for puppies and seniors, and great for training or daily rewards. Just make sure to use xylitol-free peanut butter—safety first!
Tips for Using Training Treats Effectively
Use them only for training – Keep special treats reserved for learning time to maintain their value.
Be quick – Deliver the treat immediately after your dog performs the correct behavior for clear reinforcement.
Stay consistent – Use the same word or hand signal each time to pair the behavior with the reward.
Reduce treat size – If your dog is getting full or distracted, make treats smaller. Even a pea-sized piece can be motivating.
Fade treats over time – Once your dog consistently performs the command, gradually reduce treat frequency and replace with praise, toys, or affection.