So your dog’s tummy doesn’t love wheat? Or maybe you’re just being proactive about keeping their diet as clean and simple as possible. Either way—gluten-free dog treats are where it’s at.
These easy homemade recipes are free from wheat, barley, and rye—but packed with flavor, crunch, and tail-wagging goodness. Perfect for sensitive stomachs, allergy-prone pups, or dog parents who just like to keep it real and wholesome.
Let’s get into it: two gluten-free dog treats that are big on taste, gentle on digestion, and easy on your schedule.
Why You’ll Love These Bites
These no-bake treats are a lifesaver for busy days or warm months when turning on the oven feels like too much. With only three ingredients, they’re easy to make, packed with fiber and protein, and loved by even the pickiest pups. Plus, you can customize them by adding a sprinkle of ground flaxseed, shredded carrot, or a pinch of cinnamon (if your dog tolerates it well).
Gluten-Free Dog Treats
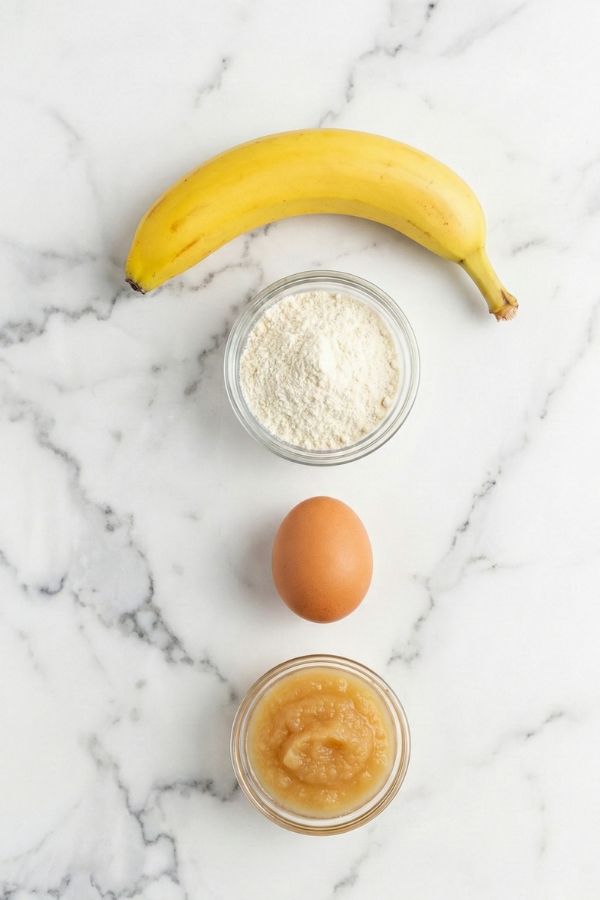
Coconut & Banana Dog Biscuits
Ingredients:
- 1 ripe banana (mashed — the riper, the sweeter and softer it will be)
- 1/2 cup coconut flour (grain-free and high in fiber — great for dogs with sensitivities)
- 1 egg (adds moisture and binds the dough)
- 1 tbsp unsweetened applesauce (adds natural sweetness and helps soften the texture)
Instructions:
Step 1: Preheat the Oven
Preheat your oven to 325°F (160°C).
Line a baking sheet with parchment paper or a silicone baking mat. This prevents sticking and ensures even baking, especially important since these biscuits won’t spread much in the oven.
Tip: Coconut flour tends to cook quickly on metal surfaces, so parchment helps avoid overbrowning.
Step 2: Mash the Banana and Combine Wet Ingredients
In a medium mixing bowl, peel and mash the banana with a fork or potato masher until it’s completely smooth. You don’t want any large chunks — especially for smaller dogs.
Next, add the egg and applesauce to the mashed banana. Mix everything thoroughly until the texture becomes smooth and creamy.
This is the foundation of your dough. The more evenly combined your wet ingredients are here, the better your dough will hold together once the flour is added.
Step 3: Add the Coconut Flour
Gradually add the coconut flour to your wet mixture, stirring continuously.
Because coconut flour is highly absorbent, you’ll notice the mixture thickens quickly and may seem dry or crumbly — this is completely normal.
If the dough feels too dry or won’t hold together, add 1–2 teaspoons of water or a bit more applesauce to bring it to a soft but moldable consistency.
You’re aiming for a dough that feels similar to playdough — firm but pliable and easy to shape without crumbling apart.
Step 4: Roll and Shape the Dough
Place your dough ball between two sheets of parchment paper and roll it out to about 1/4 inch thick. Using parchment helps prevent sticking and makes cleanup easier.
Use your favorite cookie cutters to cut out fun shapes — bone, heart, paw, star — anything that makes treat time a little extra special.
Transfer the cutouts to your prepared baking sheet. These biscuits won’t spread, so you can space them fairly close together without worry.
Tip: If you don’t have cookie cutters, you can also roll the dough into small balls and press them flat with your palm or a fork.
Step 5: Bake the Biscuits
Bake the treats in your preheated oven for 20–25 minutes, or until the edges feel firm and the bottoms are lightly golden.
Keep an eye on them during the last few minutes, as coconut flour can brown quickly. If your dog prefers a softer texture, you can remove them closer to the 20-minute mark. For crunchier biscuits, leave them in the oven (turned off) for an additional 15–20 minutes to dry out as it cools.
These treats are meant to be lightly crisp on the outside and soft or crumbly on the inside, depending on how long you bake them.
Step 6: Cool Completely and Store
Once baked, transfer the biscuits to a wire rack and let them cool completely before serving or storing. Cooling on a rack allows airflow on all sides so the treats firm up without becoming soggy on the bottom.
Store in an airtight container at room temperature for up to 5 days, or refrigerate for longer freshness. They also freeze beautifully — just thaw before giving one to your pup.
Bonus: They smell like a warm banana-coconut cookie when reheated slightly — perfect for special treat moments.

Why You’ll Love Them
These tropical-scented biscuits are grain-free, dairy-free, and naturally sweetened—perfect for dogs with food sensitivities. Bonus: they smell like a mini island getaway while baking.
Let me know if you’d like a pumpkin version or a printable card for this one!
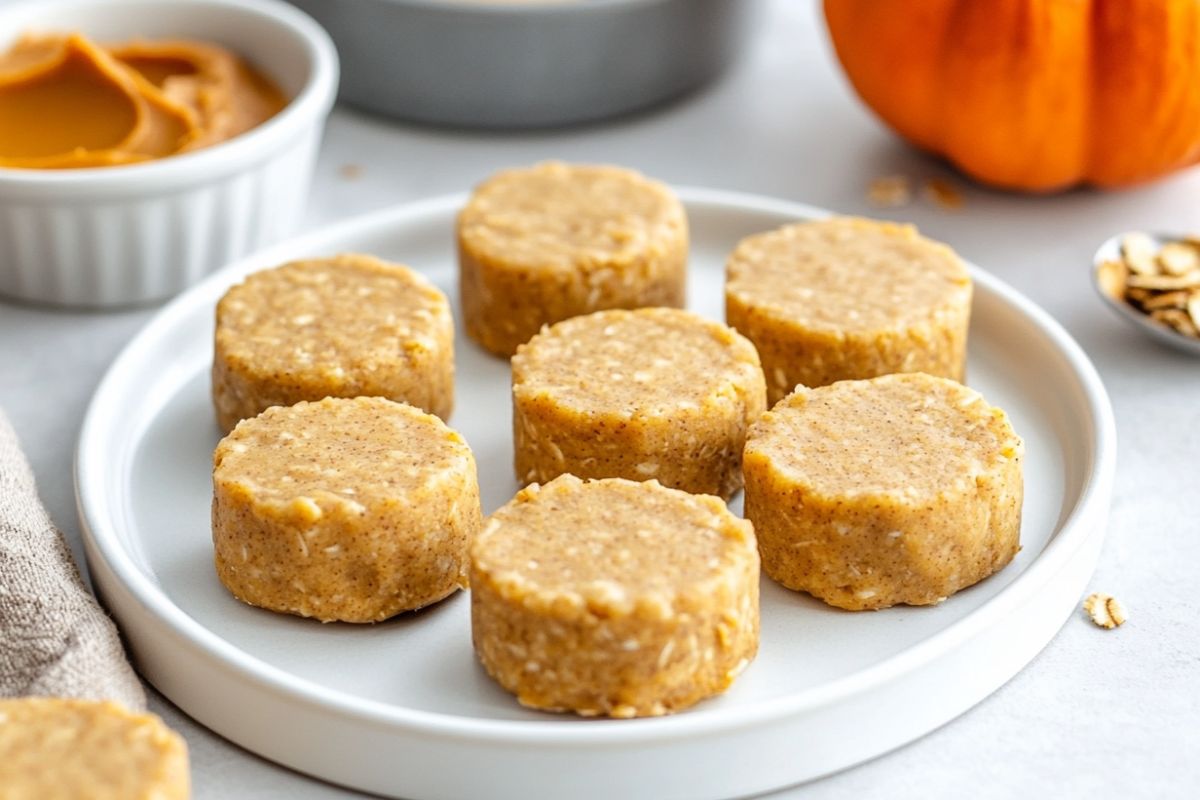
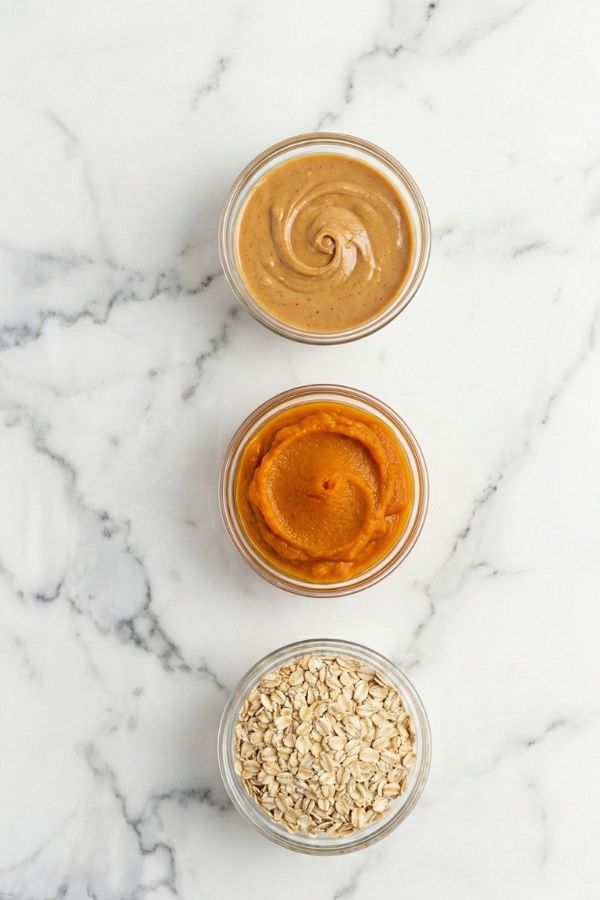
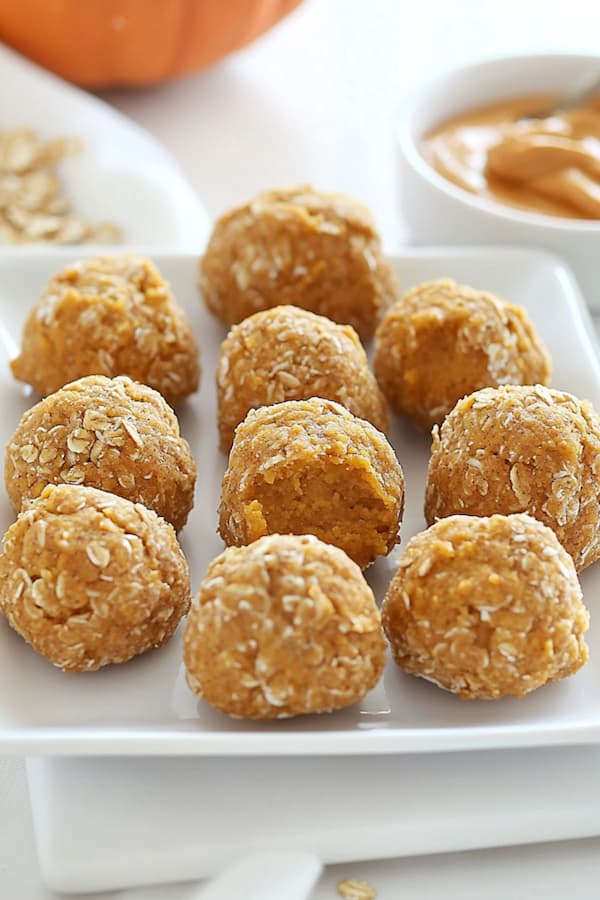
Peanut Butter Pumpkin Bites (No-Bake Option!)
Ingredients
- 1/2 cup natural peanut butter (xylitol-free — always check the label for safety)
- 1/2 cup canned pumpkin (pure pumpkin only — no added sugar or spices)
- 1 cup gluten-free rolled oats (adds texture, fiber, and helps bind the dough)
Instructions:
Step 1: Mix the Ingredients
In a large mixing bowl, combine the peanut butter, canned pumpkin, and rolled oats.
Use a spoon or silicone spatula to stir everything together. At first, it might seem loose, but as the oats absorb moisture, the mixture will begin to thicken into a dense, dough-like consistency.
- If the mixture feels too sticky to roll, add more oats—1 tablespoon at a time—until it firms up.
- If it’s too dry or crumbly, mix in an extra teaspoon or two of pumpkin until it binds smoothly.
You’re looking for a dough that holds its shape easily when squeezed between your fingers. Think of it like cookie dough—soft but not messy.
Step 2: Scoop and Shape
Once your dough is ready, use a teaspoon or mini cookie scoop to portion out even amounts.
Roll each portion into a small ball using the palms of your hands. Aim for bites about the size of a cherry or large blueberry—just the right size for training treats or small rewards.
Place each rolled bite on a plate or tray lined with parchment paper to prevent sticking.
If the dough starts sticking to your hands, try lightly wetting your palms or chilling the dough for a few minutes before rolling.
Step 3: Chill to Firm Up
Transfer the tray to the refrigerator and chill for at least 1 hour. This helps the oats continue absorbing moisture and allows the bites to firm up properly.
Short on time? Pop the tray in the freezer for 10–15 minutes instead. The colder the dough gets, the easier it will be to handle—and your pup won’t mind either way!
These bites stay soft and chewy, so chilling is key for keeping their shape.
Step 4: Serve or Store
Once chilled, your treats are ready to go! You can serve them immediately or store them for later use.
Keep them in an airtight container in the fridge for up to 5 days. For longer storage, place them in a freezer-safe container and freeze for up to 2 months. Simply thaw a few at a time as needed.
These bites are great straight from the fridge or slightly softened from the freezer—just make sure they’re not too cold for sensitive teeth.
Portion Guide & Serving Tips
Gluten-free doesn’t mean calorie-free! Even though these recipes use clean, simple ingredients, they are still intended as a supplement to your dog’s regular meals.
To keep your pup at a healthy weight, ensure that all treats combined stay under 10% of their total daily food intake. Since coconut flour is high in fiber and pumpkin is nutrient-dense, it’s always a good idea to start with just one small piece to make sure it sits well with your dog’s digestive system
A Quick Note
I love sharing these “tummy-friendly” recipes with you, but I want to be clear that I am not a professional pet nutritionist. These snacks are homemade alternatives meant for healthy dogs, especially those who may have mild sensitivities to grain.
Please check with your veterinarian if you have concerns about your dog’s allergies or if you’re unsure how these ingredients might interact with their specific health needs. If your dog is showing signs of a serious food allergy or if you aren’t sure about the right serving size for their breed and weight, your vet is the best resource for a professional opinion!
What Is Gluten and Why Might Dogs React to It?
Gluten is a protein found in wheat, barley, and rye.
While most dogs tolerate it just fine, some may experience digestive issues, itchy skin, or chronic inflammation when consuming gluten.
Gluten sensitivity isn’t super common—but when it shows up, it’s worth switching up your treat game.
How to Know if Your Dog Needs Gluten-Free Treats
Here’s the deal—not every dog needs to go gluten-free. But if your pup is dealing with some mystery symptoms, it might be worth a try (after a quick chat with your vet, of course).
Here are some signs that gluten might not be your dog’s best friend:
- Itchy paws or ears that just won’t quit
- Chronic ear infections (the kind that keep coming back)
- Digestive drama like gas, diarrhea, or frequent vomiting
- Licking or chewing at their feet constantly
- Low energy or dull coat that’s not improving with a good diet
If any of these sound familiar, switching to gluten-free treats and meals might help you pinpoint what’s bugging your pup. It’s not about hopping on a trend—it’s about helping your dog feel better, one snack at a time.
And hey, even if your dog isn’t gluten-sensitive, these recipes are packed with clean, simple ingredients you can feel great about.